Overview:
The Maven build-tool is an integral part of most Java Projects. As such, learning to leverage it is a valuable skill. The steps change from IDE to IDE.
For instructions on how to create a maven project using the CLI or using Visual Studio Code, please reference my previous tutorials. In this tutorial, we will strictly stick to creating a Maven project using the Eclipse IDE for Java.
Step 1:
Open the Eclipse IDE and use the shortcut keys CTRL+N to open up the 'Select a Wizard'. Collapse the Maven folder and select 'Maven Project'. Then click Next.

Step 2:
You'll reach the 'New maven Project' screen. Click Next again.

Step 3:
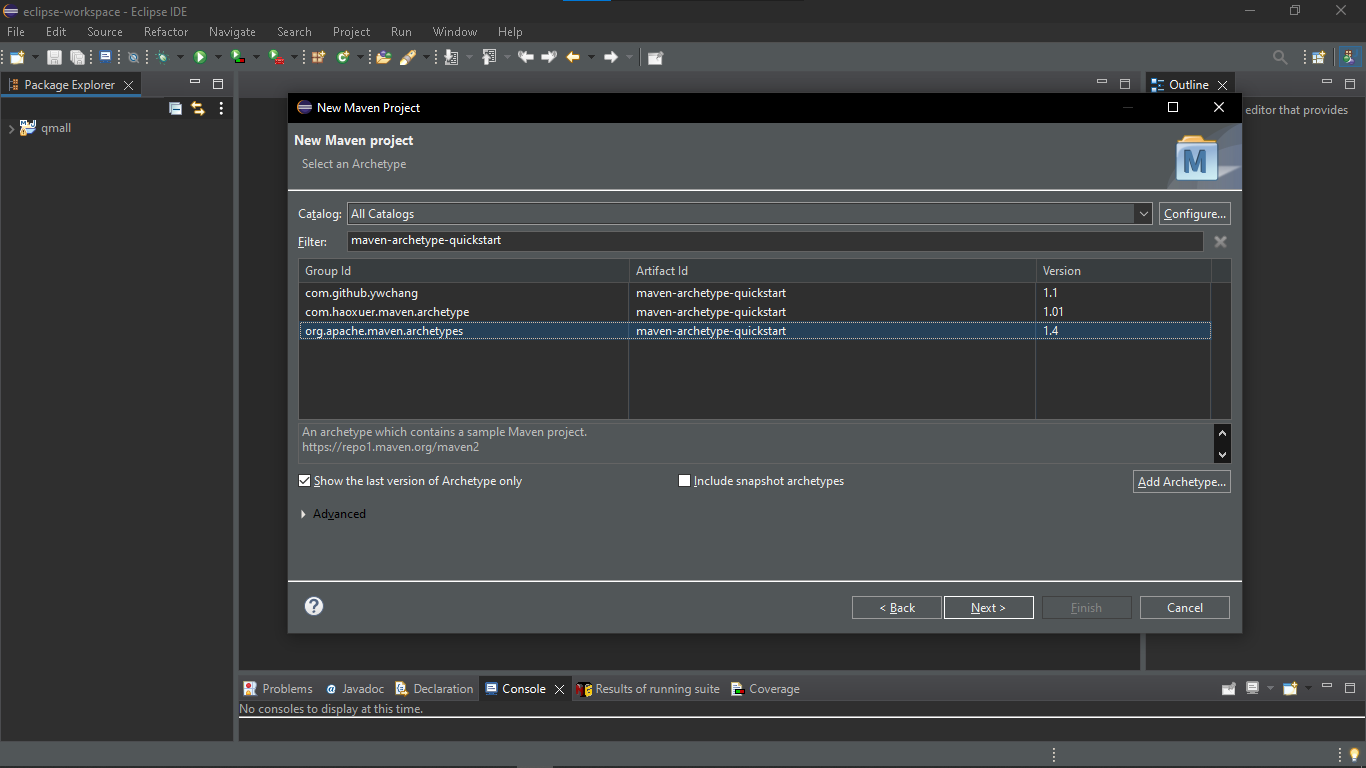
Now we are in the 'Select an Archetype' screen. Enter ' in the Filter field. A list of archetypes will be displayed. Select the archetype with the GroupID: 'org.apache.maven.archetypes' and the version is 1.4. Then click on Next.

Step 4:
Next, we need to input the GroupID, and ArtifactID data to the wizard. Follow the requirements for the project that you're currently working on. Inputting the GroupID and the ArtifactID will automatically input the value for the Package field.

Clicking on Finish will create the Maven project. The new project is created with the default maven project structure.

Conclusion:
Once the project is created, the next step is to list the dependencies required for the project. This can be done by adding the dependencies to the pom.xml file in the maven project. Look forward to learning more on this in upcoming tutorials from me.
In case of any doubts, feel free to reach out to me via mail. Also, check out some of the tutorials from me in the links provided below.
